
Working with Images in WordPress
NOTE: The ‘Working with Images in WordPress’ video tutorial is currently undergoing updates.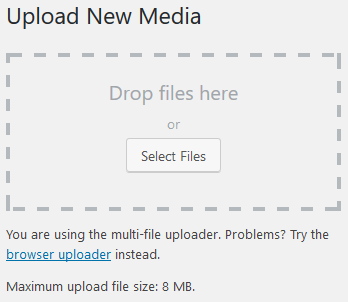
WordPress Images: Upload New Media
In the sections below I explain how to upload an image to your WordPress website via the WordPress media library and via a post or page edit screen, how to add it to display on a page or post, and what options exist to modify the layout of the image.
How to Upload an Image via the WordPress Media Library
From the WordPress dashboard, click the Add New link which displays beneath the Media link within the Admin Menu. Once the Upload New Media page loads you will want to either drag and drop the image you wish to upload into the dashed area, or click the Select Files button and browse to the image’s location on your computer and then complete the upload process. You can then return to the Media Library to confirm your image has uploaded successfully.
How to Upload an Image via a Post or Page Edit Screen
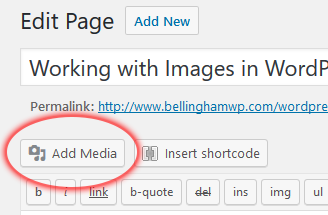
WordPress Images: Add Media From Page or Post
While either adding a new page or post, or editing an existing one, click on the Add Media button between the editor window and the title entry box. The Insert Media window loads into view. To upload your image either drag and drop the image you wish to upload directly onto the Insert Media window or click the Upload Files tab in the upper-left hand corner and click the Select Files button, browse to the file you wish to upload, and then complete the upload process.
How to Add An Image to Page or Post
Begin by navigating the edit page for the specific page or post you wish to add an image to. Once there, position your text input marker at the location you wish the image to be added. Next, click the Add Media button near the top of the edit page. Once the Insert Media window displays, either upload the media you wish to add or click the Media Library tab and select a previously uploaded image. Review the options and settings on the right-hand side of the window for that particular image and set them to your desired values (see below for more information on these settings). Finally, click the Insert Media button in the lower-right of the window.
From there, if you have the Visual tab active on the editor window, you will see that the image has been added. If you have the Text tab active for the editor window, the code responsible for the display of the image will be input at your input cursor location.
Image Layout Settings and Other Options
WordPress Images: Visual Options
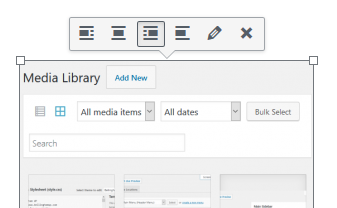
With the Visual tab active, click on the image as it appears in the editor window and you will see several different options. These options, from left to right, are Align Left, Align Center, Align Right, No Alignment, Edit, and Remove. To hide this menu without selecting any option, click somewhere else on the page not on the image.
Align Left: The Align Left option will position the image to the left-hand side of the page and will allow text to flow around it, to the right.
Align Center: The Align Center option will position the image in the horizontal center of the page, no text will flow on either side of the image.
Align Right: The Align Right option will position the image to the right-hand side of the page and will allow text to flow around it, to the left.
No Alignment: The No Alignment option will remove any alignment settings and set the image to display within the flow of the page’s content.
Edit: The Edit option will launch the image edit window for that particular image and present the user with the option to edit the image or set various other text values. These values include the image caption, alternative text, alignment, size, link to, image title attribute, image CSS class, the link behavior, the link REL attribute, and the link CSS class.
Remove: This will remove the image form displaying on the page.