
WordPress: Customize the CSS for specific pages or posts
WordPress is a very intelligently built content management system (CMS). So intelligent, in fact, that the developers knew WordPress users might have a need to modify specific pages independent of their other pages or posts. To facilitate this, WordPress provides an intuitive CSS class and ID structure which we can make use of.
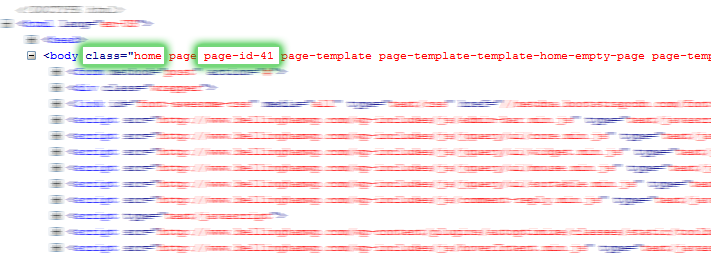
The <body> HTML section of each page will contain a unique class which will allow you to target the specific page or post. Continue reading below for more detailed information.
WordPress CSS: Targeting the Homepage
In order to target the CSS on the homepage specifically you can use the class .home. This class is automatically applied to the <body> of the homepage of all WordPress themes.
Example:
Lets say you have an image which displays in the header of every page of your website. For styling reasons, you would like this to not display on the top of the homepage but to continue displaying within the header of every other page and post.
Current HTML within the header:
<div id="header">
   <div id="logo"><a href="#"><img src="#"></a></div>
   <div id="header-image"><img src="#" /></div>
</div>
Targeting the Homepage’s CSS only:
The CSS rule necessary to stop an element from displaying is: display: none;. However, applying this rule directly to the #header-image ID would make the image not display anywhere on the website. To target the Homepage specifically we would want to include the parent class .home.
.home #header-image { display: none; }
This CSS rule will only apply to the #header-image element if it is a child of the .home element. And, being as the .home class is added to the body element on the homepage only, it will only be applied on the homepage.
NOTE: It’s important to note that if you add the class .home somewhere else in your website yourself this CSS rule could still be triggered. This would only occur if the .home class was added in a manner that would make it a parent of the #header-image element.
WordPress CSS: Targeting the Blog Index Page
Similar to the example above, the Blog index page has a class added to the <body> element automatically as well. This class is .blog.
Example:
Following along with the above example, how could we target only the Blog page and no other page or post?
Targeting the Blog Index page’s CSS only:
.blog #header-image { display: none; }
As you can see, we simply swap the .home for .blog so that the rule applies to the blog index page instead of the homepage.
WordPress CSS: Targeting A Specific Page
Each page in WordPress has a specific class added to its <body> element which corresponds to that specific page’s internal ID. This class, which contains the page ID, can be used as a reference point for targeting a specific page.
Example:
Continuing along with the initial outlined example above, what if you wanted to remove the header image from displaying on the Portfolio page of your website? You would first need to determine that page’s unique ID and apply it in this fashion:
.page-id-662 #header-image { display: none; }
In this example, the Portfolio page’s ID is 662.
WordPress CSS: Targeting A Specific Post
WordPress posts aren’t left out of the fun either. They also feature their own unique ID which is added to the <body> element. It can be utilized as follows:
Example:
.postid-2279 #header-image { display: none; }
In this example, the post in question’s ID is 2279.
WordPress CSS: Targeting Multiple Specific Pages or Posts
Lets say you want to hide the header image on all of the above listed example pages.
Inefficient Example:
You could add them to your CSS file one by one like this:
.home #header-image { display: none; }
.blog #header-image { display: none; }
.page-id-662 #header-image { display: none; }
.postid-2279 #header-image { display: none; }
Or you could add them as a single CSS rule like this:
Efficient Example:
Or you can combine them into a single rule like this:
.home #header-image, .blog #header-image, .page-id-662 #header-image, .postid-2279 #header-image { display: none; }
Using the efficient example above, in the future if you identify additional pages or posts that you would like to hide the #header-image element on you would simply add another comma to the end of the list of selectors and include the new selector.
Clemens • March 27, 2017 •
Hit here, great explanation, thanks for that. Do you have any idea how to change the css of custom post types like events manager plugin or similar?
This is my body tag:
I can change css on postid 694 but I want to change css on every events page but not the normal WP pages.
Cheers
Rick D'Haene • April 27, 2017 •
Hi Clemens. I’d recommend going to one of the Event Manager pages and looking in the page source code at the classes added to the
tag. It depends on the plugin used for your Events, but it’s likely that there will be a few classes added on the Events pages only. Compare these classes to theclasses on non-Event’s pages.Failing that I would find the template files used for loading the Event pages and attempt to add a unique class myself. This would need to be reinstalled whenever the plugin is updated.
If you need more assistance just shoot me an email with a link to the event page(s) in question and I’ll see what info I can provide.
– Rick
Michael Hurckes • May 21, 2017 •
This is awesome content mate, thank you
Pradeep M. • June 7, 2017 •
Thanks for the great article!
Fred • June 15, 2017 •
Hi Rick – Perhaps you’re still responding to comments on this post. I use page-id-xxx quite a bit in my CSS and I would like to substitute the unique page ID for a string (like “ProductPage”) that I can embed in that page so when I clone say page-id-333 to page-id-444 (since I’m updated and testing certain features) I don’t have to touch the CSS page-id value and just ruse page-id-ProductPage. Hope that makes sense. And thanks!
Rick D'Haene • July 6, 2017 •
Hi Fred,
Great question. What you’d want to do is setup a template for product pages within your theme and then add the desired class to be output within the
tag’s Class attribute. Then you’d need to set the product page to display using the new template. When cloned, the template should still be selected and the added class will be output on each page with said template applied. There are other ways to do this, of course, but, in my opinion, this is the most straightforward approach which should be applicable for most themes.Odds are good that your theme will output the body tag within its header.php file with the following code:
>. As such, you wouldn’t be able to add in the new class via the template file itself. So:>to be>. This will add the class “ProductPage” to your Body tag’s Class attribute list.to the top of the file. This is the name which will be added to the list of templates for you to choose from within the page editor.get_header();call to read asget_header('products');. Doing this will load the new header-products.php file we created in which we’ve added the desired additional class.That should do the trick. Also, it’s important to note that these modifications should be added via a child theme and not directly to the parent theme. Being as we’re not modifying any core theme files, only adding new ones, you shouldn’t have any problems adding them directly to the parent theme. However, utilizing a child theme would follow standard process and help secure forward compatibility through parent-theme updates.
Helpful Links:
Get in touch if you’d like more hands-on assistance.
– Rick
Colten • July 28, 2017 •
Hey is there a way to target all the blog posts without having to individually write them out? Something like
.post-idor something like? I did the blog index page, but I’d like to target each blog post as well, but not the actual pages of the site. Thanks for the article!Rick D'Haene • December 19, 2017 •
Hi Colten,
If you check the Body element for a few posts within your theme you should see a set of classes which repeat. I believe these are .single or .single-post most commonly. But if you copy the classes listed on a few posts into a text document, and then do the same for a few pages, including the homepage, the class structure differences should become quite clear to you for your theme.
Once done, or to check that the rules aren’t applying to pages / posts you do not want them to, I suggest setting something easily recognizable within the CSS, but not intrusive to live visitors (supposing the website is live). I will commonly add something to the effect of:
.single:after { content: " By Bellingham WP, LLC."; }Adding this should cause the quoted message to display AFTER the Body element (to which the .single class is assigned). So then you can simply browse through your website, page-by-page, post-by-post, until you’re satisfied the rule is applying ONLY to the intended posts / pages.
Matt • August 9, 2017 •
Try to find some info on wordpress.org…found nothing simple and useful for a a quickfix but thanks to you my problem is solved !
Many thanks for the explanations, it is all crystal clear : they should put your post on official site 🙂
WordPress CSS targetting is very very useful ! As I didn’t want to do too much php files modifications, it’s perfect !
MoorthySL • September 22, 2017 •
Thank you very much.
IThanks for the great article!
Regards,
Moorthy S L
Aljoscha • October 6, 2017 •
Is it possible to apply that in an easy way for a lot of css code?
I have a lot of css code and want to make that all to apply to one or multiple wp-pages only. I don’t want to touch every css element. Is there a way to do that/to factor out?
/* only apply to .page-id-662, .postid-2279, … */
#header-image { display: none; }
#testone { display: none; }
#testtwo { display: none; }
#testthree { display: none; }
.header-image { display: none; }
.testone { display: none; }
.testtwo { display: none; }
.testthree { display: none; }
/* END */
/* apply to all pages/posts/elements on homepage */
#testfour { display: none; }
.testfour { display: none; }
Rick D'Haene • December 19, 2017 •
Hi Aljoscha,
The WordPress CSS Class and ID structure is very useful and intuitive. In addition to being able to isolate a page / post’s CSS based on its ID, you can also use other classes which apply more broadly to specific sets and groups of posts. If you look at the classes which exist within the Body element of your websites pages and posts, you’ll see numerous classes which you can tap into for adding rules. If you want to target all pages which use a specific template, the templates name is usually added as a class to this section. For my example, you can see the class “page-template”. Using this class would apply the CSS rule ONLY to pages with this class in the Body element, and only pages which use the Page-Template file should be output with this class.
With regard to WordPress posts, you can usually make use of classes such as: post-template-default, single, or single-post. Again, you’ll want to check to see what CSS classes your pages and posts are outputting within the Body element.
Also, depending on how your theme is coded, you may be able to manually add specific CSS classes to the Body element from directly within a template file itself.
But, to speak to your goal more broadly, CSS will require you to define what / where you would like the CSS rules to apply each time. If you would like them to apply to individual post and page ids which don’t currently exist, those IDs would need to be added after those pages are created. Otherwise, if there are fewer pages to which you would like the rules to NOT apply, you could create a set of general CSS rules which apply to ALL pages, and then use additional CSS rules to override them for only the specific pages you want.
If I were coding this up for a client, I would first look for an existing template file which is driving the current pages. Once found, I would duplicate this template and make it unique with a new name, such as Template Two, and set it up with a unique class or ID which the default template doesn’t contain. Then I would set my CSS rules to apply to the default template(s), and add additional rules to override them when displayed within the newly created template. In this way, at the time of page creation the specific template would be selected based upon the needs of the page. Either the default, original template which features the now global CSS rules, or Template Two which does not.
Dennis Duenas • November 13, 2017 •
HI
I’m trying to add page headers for new pages. I’m stuck on where to find this and where to add. Can you help?
For instance, the About Us page has a header image. However, on the newly created Expanding Real Estate Page I’m not sure how to add a header.
Sweetwaterranches.com
Rick D'Haene • December 19, 2017 •
Hi Dennis,
The addition or modification of a WordPress theme’s header depends on how the theme is coded itself. Within the index.php, or a template file also located within the WP theme or child theme, you will either see the output code for the header itself, or you will see a function where a header file is included. From there you can either modify the section to your liking or duplicate the header file and include it via a new template.
Independent headers / header images may also be a facet of the theme you’re using. If so, I would anticipate options to be available within the Page or Post editor. You may also want to try setting the desired image as a featured image on the page / post in question, as the theme may be setup to use the image in this way. Otherwise, the options may be located with a theme-specific menu.
Regardless, if you have a working example (the About Us page) you should be able to review it’s setup to discern how it’s being added.
V An. • November 29, 2017 •
Wow, thanks for sharing, it’s helpful for me!
Dev • December 3, 2017 •
Thanks for the explanation Rick!
Alexa • March 7, 2018 •
Wow, this just made my life a lot easier! Thanks for your well-written post.
John Woodruff • November 29, 2019 •
Very helpful, thank you. I had pulled out much hair inspecting lower-order classes….it never occurred to me that I would have to go that far up the doc tree to scope the css. But worked perfectly.